Honeycomb / Hexagonal Layout
1. General
You need to select at least two objects.
The transformation point (pivot point) for each object is top left.
Order of objects is defined by the Sublayers from top to down.
If you need to change the order please change the sublayers in the Sublayers menu directly.The units will be taken from your document. If your document has pixels as units than a gutter width of 10 applies 10 pixels width. If you have inches than gutter width of 10 is 10 inches….you get it.
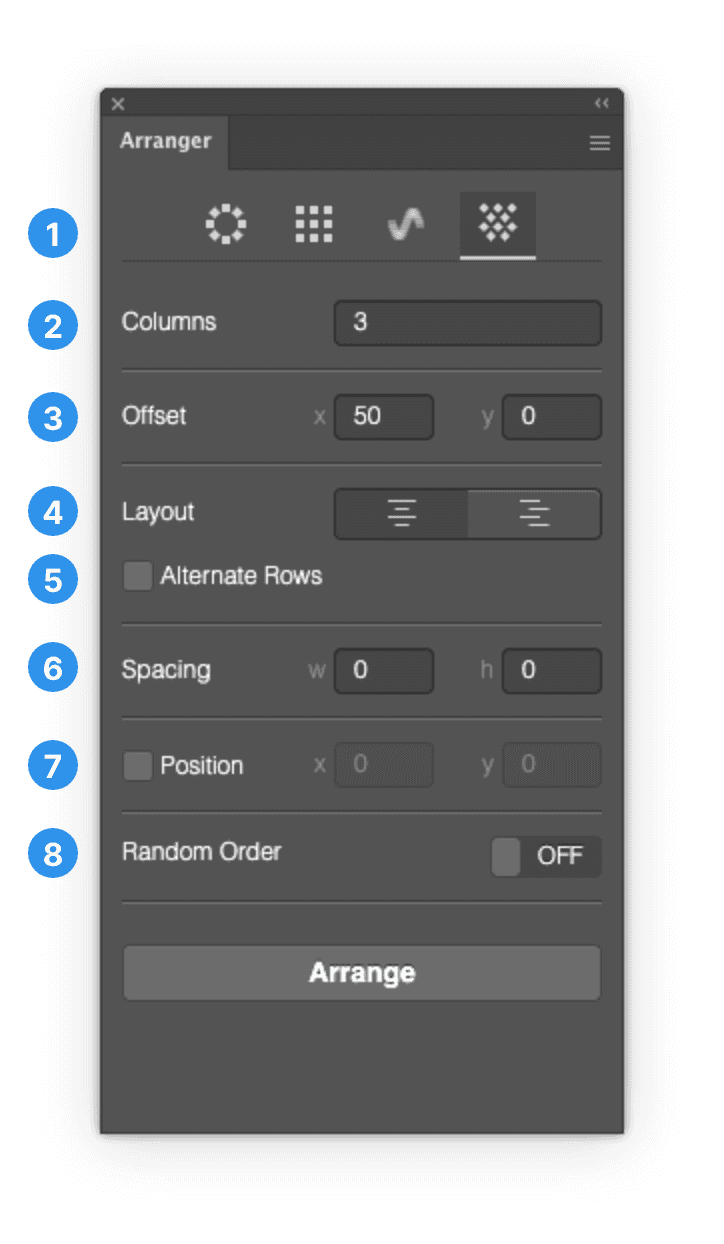
2. Columns
Set the maximum number of columns. Every other row will be shorter to achieve the honeycomb layout.
Lowest number of columns is 2. Zero and negative numbers are not possible.
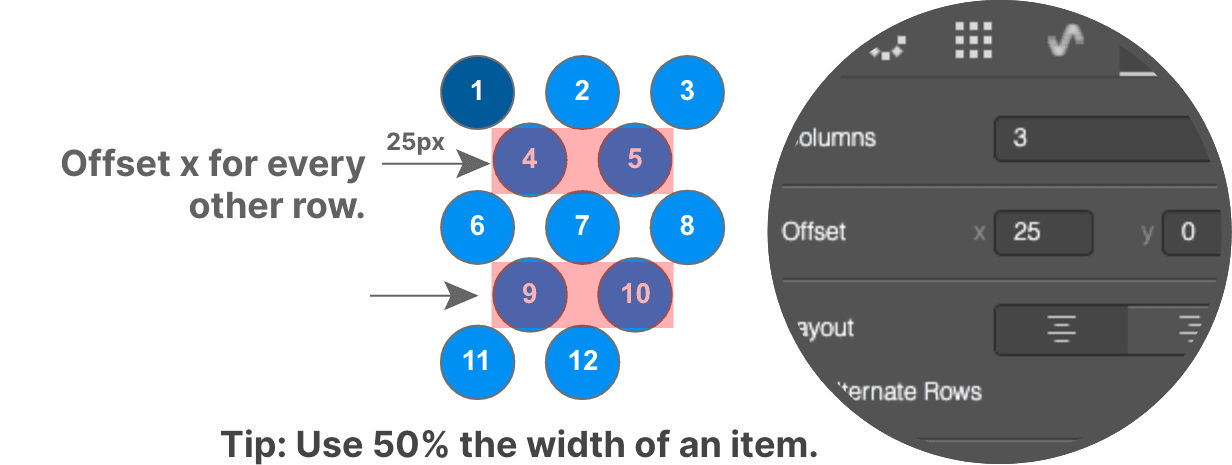
3. Offset
Offset is the most important value to achieve honeycomb layouts.
x: you usually want this to be half the width of an item.
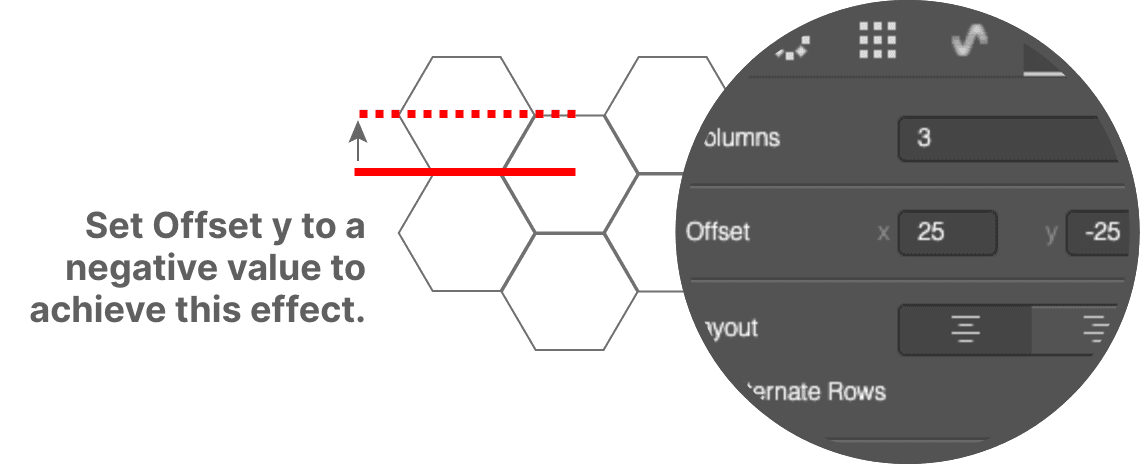
y: this works the same as „x“ but just for height.
BUT: most of the time y needs to be negative to move up between the objects of the row above.
Offset x:
Offset y:
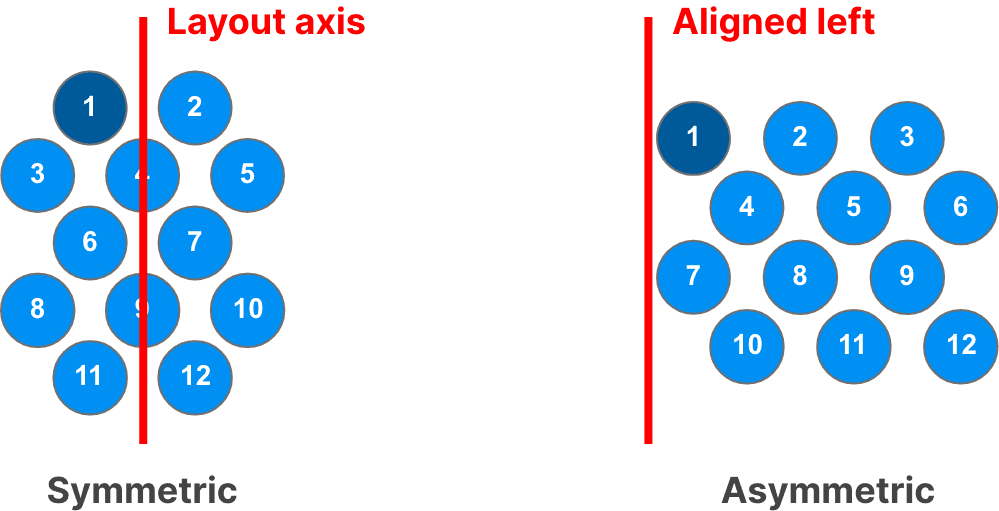
4. Layout
The first (default) option is symmetric layout. This is similiar to center a textfield. Rows are layout by their center.
The second option is asymmetric layouts. That means the rows are aligned on the left side.
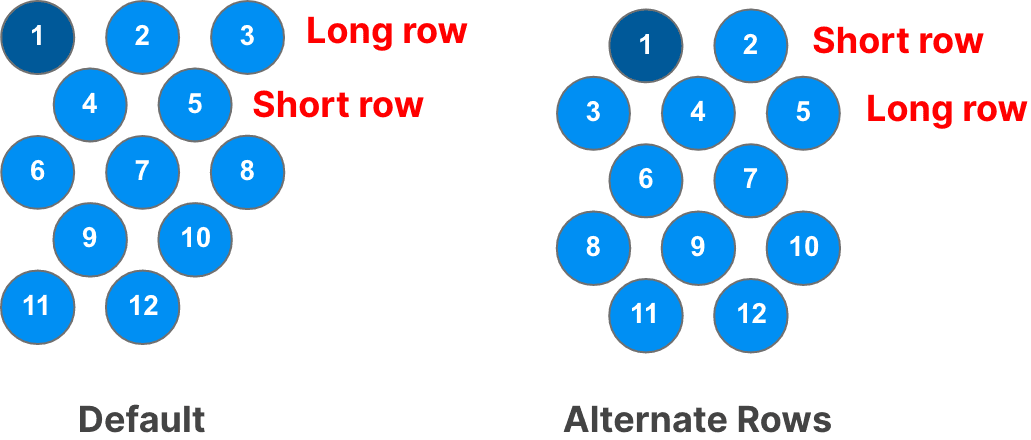
5. Alternate Rows
By default each row starts with the long row. After that comes the short row and so on.
Here you can change that order and start with the short row.
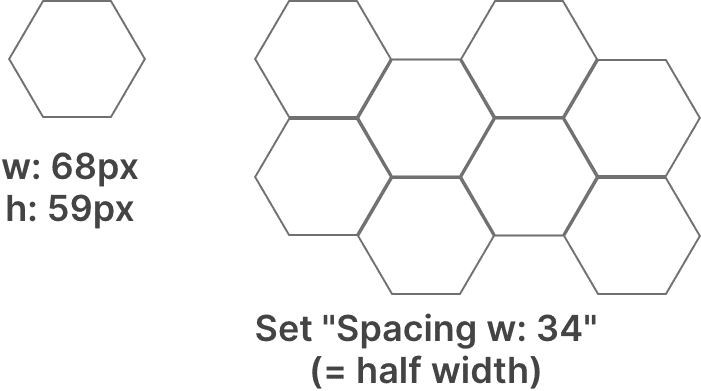
6. Spacing
In „Grid“ this is called gutters. This defines the distance between object on x and y axis.
Important for hexagons: if you have hexagon objects you need to adjust spacing additionally to
7. Position
Define the position at which the layout patterns should start.
8. Random Order
With this option the order of objects will be randomized.
If you uncheck it then it will reset to your default order defined by layers.
Note: The new random order is just „virtual“. This real order in layers is not changed.