Grid Layout
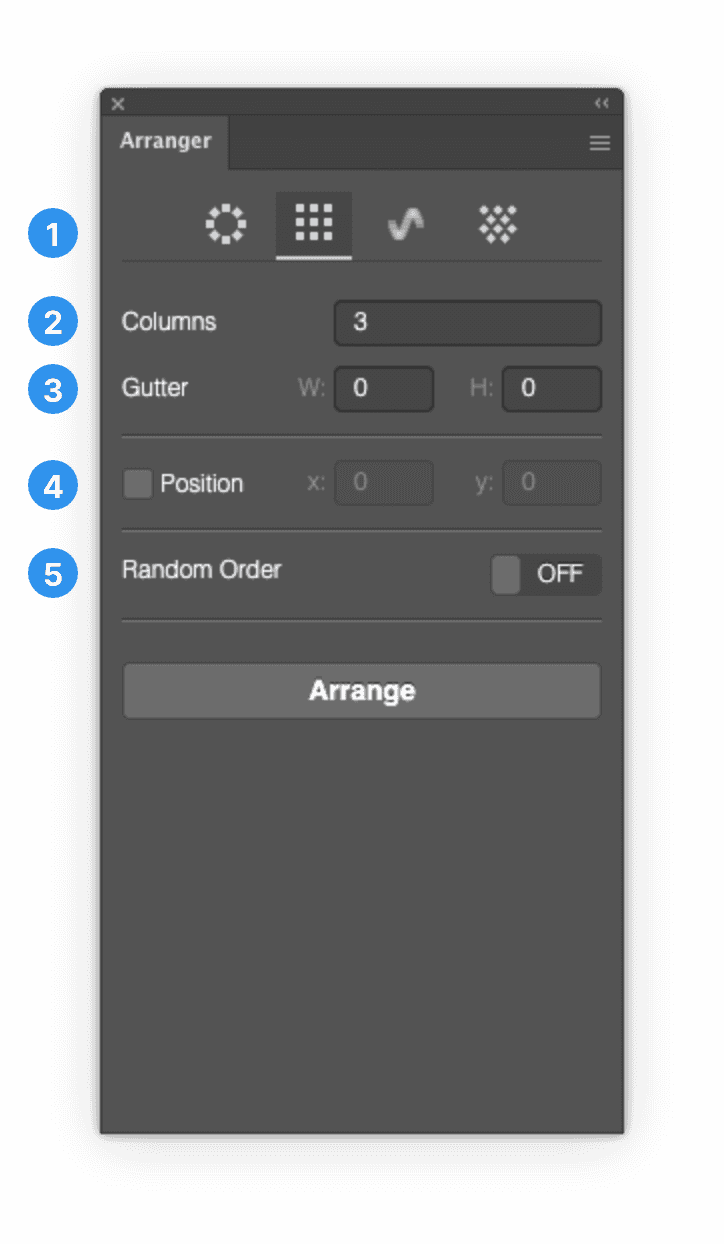
1. General
You need to select at least two objects.
The transformation point (pivot point) for each object is top left.
Order of objects is defined by the Sublayers from top to down.
If you need to change the order please change the sublayers in the Sublayers menu directly.The units will be taken from your document. If your document has pixels as units than a gutter width of 10 applies 10 pixels width. If you have inches than gutter width of 10 is 10 inches….you get it.
Take a look at the walkthrough video: https://youtu.be/ZqGMLnB1Ed8
2. Columns
Sets the amount of columns. Number of rows will be calculated automatically.
Lowest number is 1 which equals to 1 column layout. Zero and negative numbers are not allowed.
If you want to achieve a single row set the columns to the count of objects (e.g. if you have 10 objects than a column count of 10 will result in a single row).
3. Gutters
Gutter defines the horizontal and vertical spaces between objects.
W = horizontal space. H = vertical space.
You can also use negative values to achieve overlapping objects.
4. Position
This is an optional value. By default the position will be taken from the first object (top left).
If you activate Position the grid layout will start (top left) at exact this value.
5. Random Order
This is an experimental feature. With this the order of objects will be randomized.
If you uncheck it then it will reset to your default order defined by sublayers.
Note: The random order is just internal. This value does not change the real order in sublayers.
Open the layers panel in parallel to watch how this not affects the real order.
If you want to change the order of objects manually please change the order of sublayers.